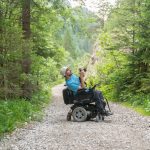
Taking on any hiking trail with a 5% slope and higher depends a lot on how well your wheelchair is built, how experienced you are on hills, and what is the makeup of the trail surface. I also recommend that you wear a seat belt when taking on any dirt trail. Several times my wheelchair stopped suddenly after hitting a solid object on the trail, and my seat belt kept me from being ejected out of my chair. Lastly, and this is really for all hikers, bring water with you. Not all trails have water fountains or bathrooms…
My Trail Checklist
- What is the makeup of the trail surface?
- Are there rocks or tree roots in the trail?
- How steep is the hill you want to go down?
- Does the trail straighten out at the bottom or curve around?
- What is the length of the hill?
- How narrow is the trail?
- Do bicyclists share the trail?
- Is there cell phone service?
Photo of Accessible Rating System
(Click to Enlarge)
Defining Trails
- Easy – Trails usually meet ADA requirements. Most of these trails are paved or have a hard surface face. They also have less than 5% slope, (grade, incline, hill).
- Intermediate – Trails do not meet ADA requirements but still might be accessible. Most of these days have a dirt surface and have less than 10% slope. You want to make sure you have a rugged and sturdy wheelchair or power chair to take on these types of trails.
- Advanced – The trail slope can be 10% to 14%. These trails aren’t designed for wheelchairs or power chairs, and as I have found out a few times they can be dangerous. More than once I have gone down a trail with a steep slope and have my wheelchair lose control on the loose dirt. Luckily, each time that happened the bottom of the trail went straight.
- Extreme – Trails have a slope of 15% or higher. I’ll only go down this steep of a trail if it is paved and the distance is short. You want to make sure you have good health insurance before taking on this steep of a hill, especially if it is a dirt trail.


